



Charlie Ngo
•
Last updated: 7 October, 2026
Shopify Product Configurator: 2D vs 3D, Best Apps & Costs (2026)
Shoppers hesitate to buy a $1,200 sofa or a custom ring when they can’t see the exact version they’re...
Shopify Shipping Rates Explained: Complete 2026 Guide

Marketing Manager
Summarize this post with AI
More than 70% of online carts get abandoned, and the number one reason is extra costs like shipping that feel too high, according to the Baymard Institute. On Shopify, the shipping rate a customer sees at checkout is exactly where that objection lands. When the rate is too high, unclear, or missing altogether, shoppers abandon the cart right there.
In this blog post, I’ll walk you through how Shopify shipping rates work, how to set them up correctly, and how to turn them from a checkout liability into a way to protect your sales. I’m Charlie Ngo, an eCommerce expert at BOGOS. For 11 years, I’ve helped Shopify stores lift sales, average order value, and conversion rate, and shipping settings are one of the first places I check when a store loses money at checkout.
A Shopify shipping rate is the delivery fee a customer sees at checkout. It determines how much they pay to receive their order. Each rate sits inside a three-layer structure. All three layers must work together for the rate to appear:
In simple terms, products belong to a profile, profiles contain zones, and zones contain rates. This structure matters because one missing layer can stop a rate from appearing.
Shopify gives you four core shipping options for charging delivery, and free shipping is a setting layered on top of them rather than a fifth type. Pick the one that matches how your products vary in size, weight, and value. You can read the full breakdown in Shopify’s own shipping rates documentation.
Weight-based rates also handle your trickiest products:
There is also a Shopify plan requirement to consider. According to Shopify’s Help Center, third-party carrier-calculated rates are included with the Advanced and Plus plans. On the Grow plan, you can add the feature for a monthly fee or through annual billing. Stores on lower plans may need to use flat, price-based, or weight-based rates instead.
#5 Free shipping
You can set up Shopify shipping rates in five steps. Follow them in order because each step depends on the previous one.
From your Shopify admin, navigate to Settings > Shipping and delivery.
Find your shipping profiles. Most stores begin with the General profile, which includes all products.
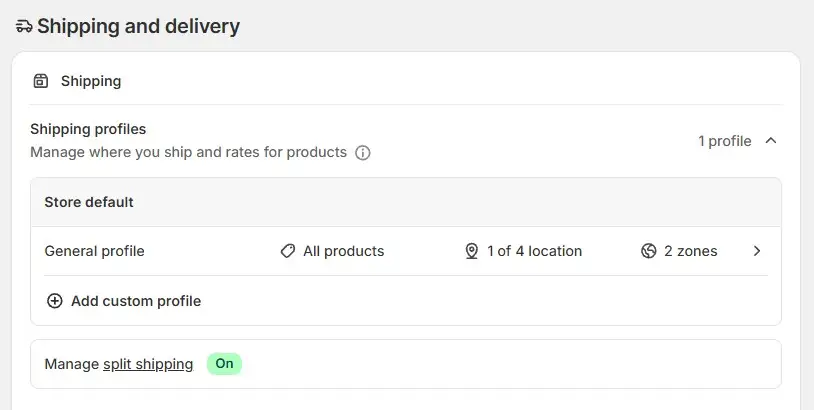
Create a custom profile only when certain products need different shipping rules. Common examples include heavy furniture, oversized items, or made-to-order products.
Open the shipping profile and confirm that a zone covers the country or region you want to ship to.
If no zone exists, click Add zone, name it, and select the countries or regions it should include.
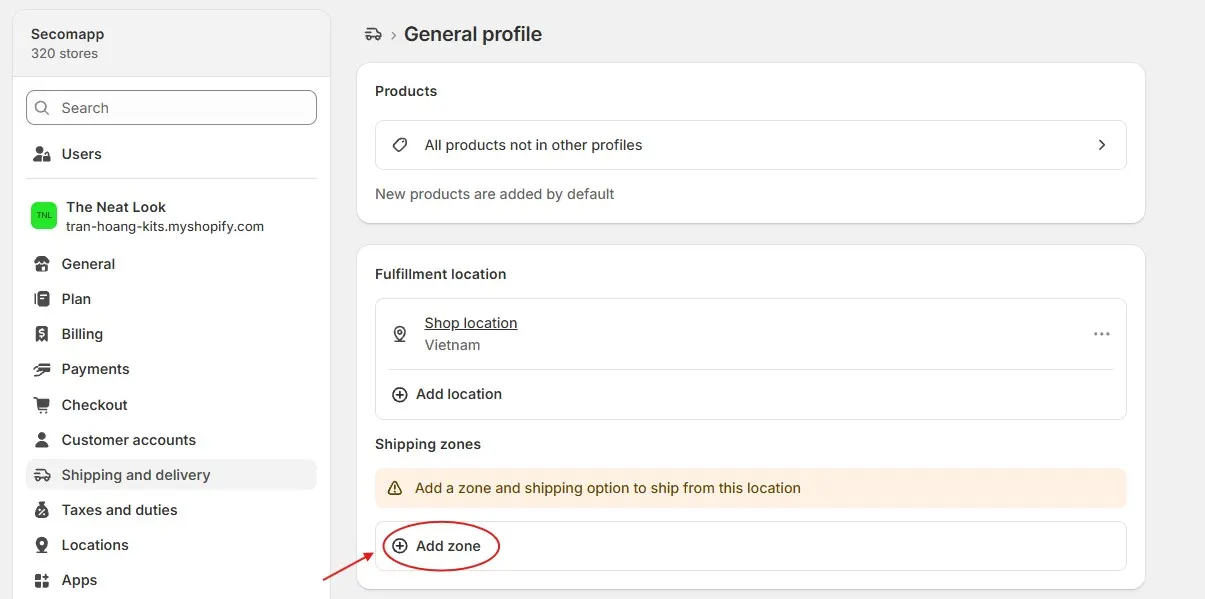
A missing zone is one of the most common reasons no rate appears at checkout. If the customer’s address is not covered, Shopify has no shipping option to show.
Inside the zone, click Add rate.
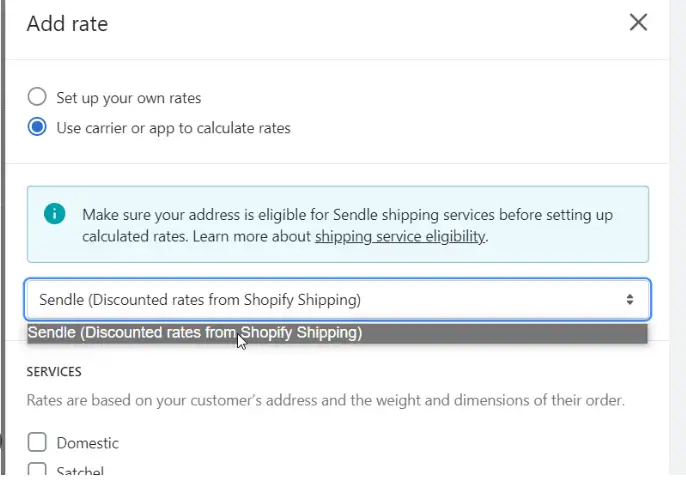
You can choose between:
If you are new to Shopify shipping, start with your own rates. They are easier to control and available on every plan.
Choose a clear name because customers will see it at checkout. For example, Standard shipping is clearer than Rate 1.
Then choose one of the following:
Save the rate and place a test order using a real customer address in different addresses you serve. This helps you catch missing zones, uncovered price ranges, and incorrect rates before a customer reaches checkout.
Mixed carts are where Shopify’s native rates get tricky. When an order contains products from different shipping profiles, Shopify adds each profile’s rate together at checkout. That prevents undercharging, but it can also inflate the total when several items actually ship in one box. A shopper who buys three products from three profiles can see three stacked shipping fees for a single parcel. And when those items come from different locations, Shopify may not ship them in one parcel at all. Our guide to Shopify split shipping explains why orders split and how the charges work.
The native rate types make this hard to solve cleanly. Shopify supports flat, weight-based, and price-based rates, but it has no built-in way to set tiers by product quantity, or to combine items that follow different per-item or per-weight rules in the same order. There are two native workarounds, and each has a limit:
When your rules outgrow what Shopify can do on its own, a dedicated shipping-rates app with custom shipping rules is the reliable fix. These apps read the entire cart and apply combined, conditional, and quantity-based rules that native settings cannot.
Before picking one, focus on three criteria:
Three well-rated options, matched to those criteria:
👉 Read more: Shopify Shipping Rates for Multiple Items (2026 Guide)
By now, your rates are set. The last step is making sure they help you win the sale rather than lose it at the final screen, because shipping cost is one of the last things a shopper judges before paying.
Real-time shipping rates are the strongest tool here. Instead of a fixed price, carrier-calculated rates pull a live quote from USPS, UPS, or FedEx based on the cart’s actual weight, size, and destination. The customer pays what you pay, with no surprise markup, which removes the unexpected-cost shock that drives most abandonment. If you want the full setup, our guide to real-time shipping rates covers the plans, carriers, and common fixes step by step.
How to enable them
Carrier-calculated rates are included on the Advanced and Plus plans, and available on Grow for a fee or with annual billing. To turn them on, go to Settings → Shipping and delivery, open your zone, click Add rate, choose Use carrier or app to calculate rates, select your carrier and services, and save.
Common mistakes and how to fix them
Before launching, confirm it works with a draft order (Orders → Create order, add products, enter an address to see the exact rates), or test live at your storefront’s shipping step.
Accurate rates are the foundation of a checkout that converts. The next layer is recovering shoppers who still leave over cost, which is where a plan for cost-driven cart abandonment picks up.
Shopify’s native free shipping threshold has one major limitation: customers often see it only at checkout. By the time they reach checkout, they may have already decided how much to spend. The timing matters here because Dynamic Yield’s ecommerce benchmarks report that only around 6% of store visits reach the cart, while close to 78% of formed carts are abandoned before purchase.
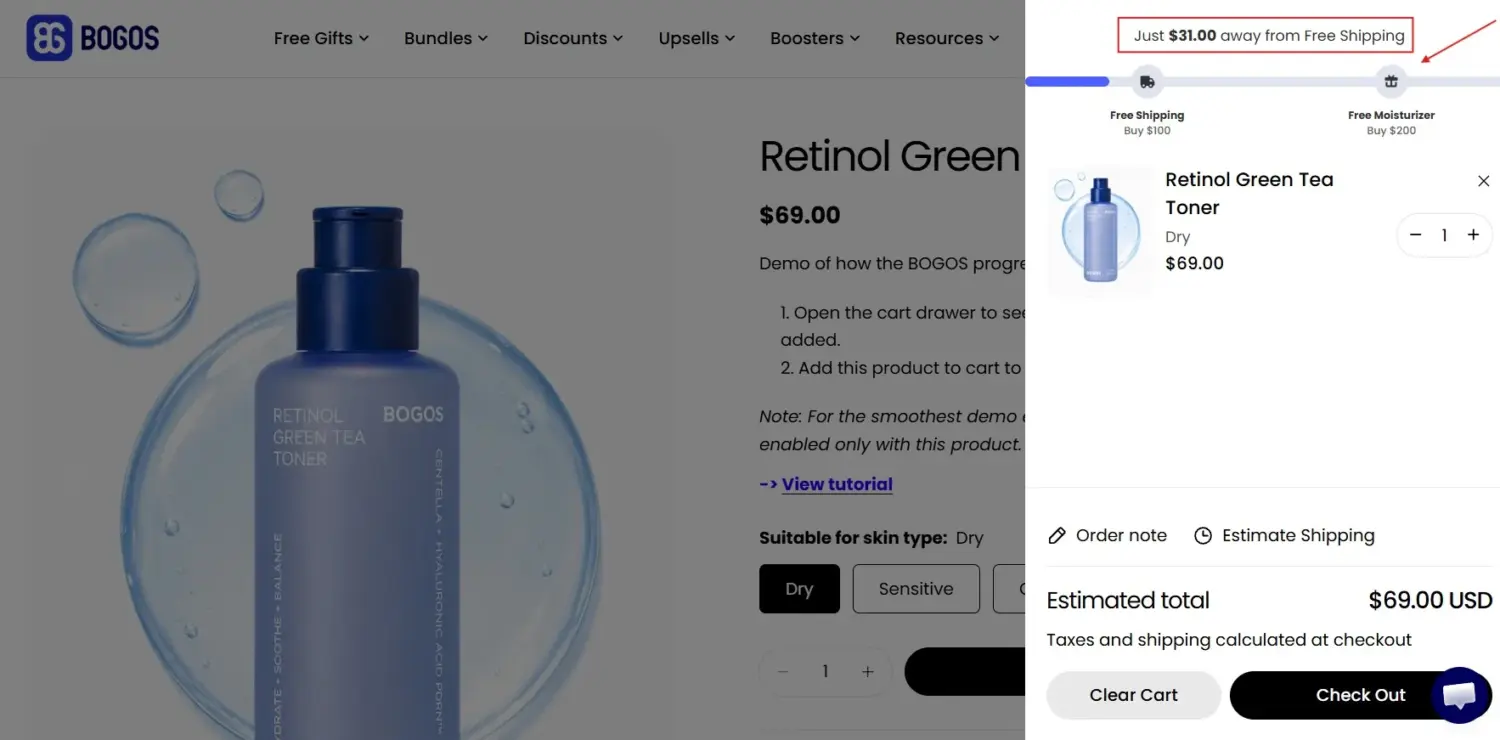
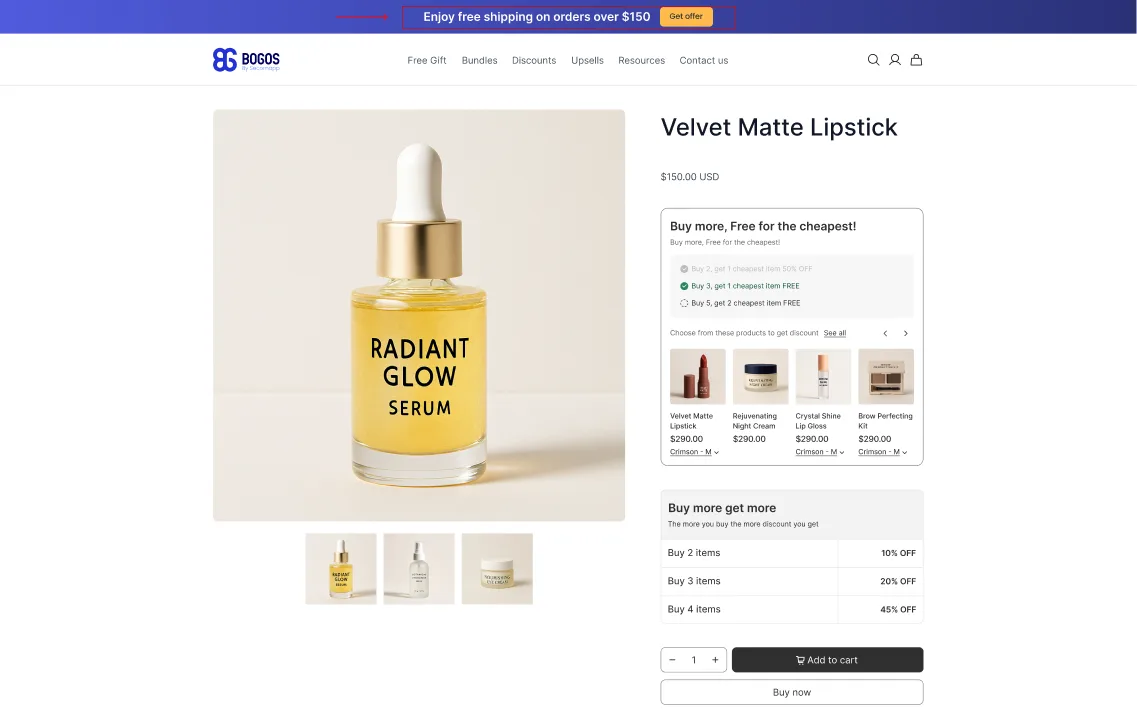
This can waste an opportunity to encourage a larger order. Our own app, BOGOS: Free Gift Bundle Upsell, closes that gap. You can set up a shipping discount that unlocks free shipping by cart value or cart quantity, and aim it at specific product groups or customer segments instead of the whole catalog.
More importantly, BOGOS shows that offers across the storefront, not only at checkout:
Unexpected shipping costs are a major reason customers abandon their carts, so your rates can directly affect conversion rate and average order value. Start with the basics: set up your shipping zones, add a clear rate, and place a test order to confirm that it appears correctly.
Then test a free shipping threshold at around 1.3 times your average order value. This can turn a common checkout objection into a reason for customers to spend more and complete their checkouts.
In most cases, the customer’s address is not covered by a shipping zone, or a product in the cart has no weight.
Go to Settings → Shipping and delivery and confirm that a zone includes the destination country. Then check that all products have accurate weights. If you use a fulfillment app, also confirm that the app’s location has active shipping rates.
Yes. Shopify can calculate shipping automatically at checkout in two ways. Its own rate types (flat, price-based, and weight-based) apply the price you set, while carrier-calculated rates pull a live quote from USPS, UPS, or DHL based on the cart’s weight, size, and destination.
Go to Settings → Shipping and delivery, open the correct shipping zone, and add a price-based rate. Set the rate to $0 and enter the minimum order value required for free shipping.
Not natively. Shopify adds each profile’s rate together at checkout. The cleanest fix is to move related products into a single shipping profile so one rate applies to the whole order. If your catalog needs separate profiles, a shipping app such as Intuitive Shipping or Advanced Shipping Rules can apply a single combined rate based on the cart’s full contents.

Shoppers hesitate to buy a $1,200 sofa or a custom ring when they can’t see the exact version they’re...

Selling personalized products on Shopify gets hard the moment a shopper needs to type a name or choose a...

The UK is the largest eCommerce market in Europe and the third-largest in the world. For international Shopify stores,...