Charlie Ngo is an eCommerce expert with 7 years of experience in the marketing field, specializing in SaaS and digital growth. A graduate in Marketing Communication, Charlie currently serves as the Marketing Manager of the BOGOS Shopify App, where he leads strategic initiatives to drive user acquisition, engagement, and brand positioning.
Australia is one of the first markets many Shopify stores expand into. It is large, English-speaking, and home to millions of shoppers who buy online every day. But shipping to Australia involves more than adding a new shipping zone. You need to choose the right carrier, understand which shipping rates Shopify can show at checkout, and handle customs correctly if you sell from overseas.
In this guide, I’ll walk through a complete guide on how to set up shipping to Australia on Shopify. I’m Charlie Ngo, an eCommerce expert at BOGOS with 12 years of experience helping Shopify merchants grow sales and lift AOV.
TL;DR
You must first add Australia to an active Shopify market or shipping zone and set at least one shipping rate so Australian customers can complete checkout.
You can connect Australia Post through a MyPost Business account, while other Australian carriers usually require a third-party shipping app or integration.
Your Shopify plan must support carrier-calculated shipping if you want eligible live carrier rates to appear automatically at checkout.
If you sell to Australia from overseas, you need to understand how the $1,000 low-value goods threshold and the $75,000 GST registration threshold affect the tax treatment of your orders.
A shipping app becomes useful when your store needs multi-carrier rate comparison, bulk-label automation, more advanced rules, or cross-border duty and tax features.
1. How To Set Up Shipping To Australia on Shopify
To ship to Australian customers, you need to complete four basic tasks:
Make Australia available as a market
Create at least one shipping rate
Connect the carrier or shipping service you want to use
Configure Goods and Services Tax (GST) and customs it if the goods are entering Australia from overseas.
For a broader explanation of shipping zones and rate types, you can explore the detailed guide on how to set up shipping on Shopify. The steps below focus specifically on Australia.
Step 1: Add Australia to an active Shopify market
For new Shopify stores, go to Settings → Markets and add a market that includes Australia. Shopify Markets lets you manage the essential settings for selling in a country, including currency, product availability, shipping settings, and duties and taxes.
Older stores may still manage Australia through a shipping profile under Settings → Shipping and delivery.
Note: If you use Shopify Payments, you can also consider displaying prices in Australian dollars to create a more familiar shopping experience for Australian customers.
Step 2: Choose how you want to charge for Australian shipping
Inside your Australian market or shipping zone, select Add shipping option and choose the rate model that suits your catalog. The most common options include:
Flat rate: Charge one fixed amount.
Weight-based rate: Charge different prices based on parcel weight.
Carrier-calculated rate: Display an eligible carrier’s live shipping quote at checkout.
Free shipping threshold: Offer free delivery once the cart reaches a set amount.
Australia Post, an Australian Government-owned corporation, is the country’s main national postal and shipping carrier. It connects directly with Shopify, allowing merchants to book shipments, print shipping labels, and sync tracking information from the Shopify admin.
You can connect it through a MyPost Business account. In your MyPost Business:
Go to eCommerce Partners → Shopify → Connect.
Generate your merchant token.
Copy the token.
Then in Shopify:
Go to Settings → Shipping and delivery.
Open Carrier accounts.
Select Connect account → Australia Post.
Paste the merchant token.
Other commonly used Australian carriers, such as CouriersPlease and Aramex, generally require a third-party app or integration, which I’ll explain in more detail later.
Step 4: Check whether your plan supports live carrier rates
This step only applies if you use carrier-calculated shipping, which means Shopify shows live shipping prices calculated by the carrier at checkout. If you use flat, weight-based, or free shipping rates, you can skip to the next step.
According to the Shopify Help Center, this feature is included on Advanced and Plus plans. It may also be available on the Grow plan depending on your billing arrangement, but it is not available on Basic or Starter.
Step 5: Configure Australian goods & services taxes for overseas sales
If you ship to customers in Australia from overseas, GST (Goods and Services Tax) obligations are one of the most important parts of your shipping setup.
Two thresholds matter most:
A$75,000 annual sales threshold: This determines whether an eligible overseas seller may need to register for Australian GST. It applies to your total relevant Australian sales over a 12-month period, not to the value of a single order.
A$1,000 consignment threshold: Once the GST rules apply to your business, this determines how GST is handled for each shipment. GST is generally collected at checkout on eligible consignments worth A$1,000 or less, while consignments above A$1,000 are generally handled through the border process.
If the GST registration rules apply to your business, you generally collect GST at the point of sale on eligible low-value imported goods. Once registered, add your GST details under Settings → Taxes and duties → Australia.
Step 6: Add the customs information Australia needs
If you ship orders into Australia from overseas, each shipment needs accurate customs information so the carrier and Australian customs authorities can identify, value, and clear the goods correctly. The main details include:
HS code (Harmonized System code): the standardized product classification customs authorities use to identify each item and assess applicable duties.
Country of origin: the country where the product was manufactured or produced.
Commercial invoice: a document that lists the goods, their value, seller, buyer, and other information used for customs clearance.
GST registration or vendor information: your Australian GST details where required if GST (Goods and Services Tax) was collected at checkout.
In Shopify, add the HS code and country of origin to each product, or update multiple products at once using a CSV file.
If you buy an eligible international shipping label through Shopify, Shopify can use your product and order information to help prepare the customs documentation needed for the shipment.
Step 7: Configure duties and import taxes at checkout
For overseas orders, extra costs such as import duties and taxes can affect a shopper’s decision to complete checkout. That’s why many merchants choose to show these charges clearly upfront, helping customers avoid unexpected costs when receiving parcels.
To enable this, go to your Shopify admin → Settings → Taxes and duties → Duties and import taxes.
Then configure Australia based on the shipping and tax setup your store uses.
Step 8: Test an Australian checkout before launch
Before going live, place a test order using an Australian delivery address on both desktop and mobile. This helps you catch unexpected issues and make the buying journey smoother before real customers reach checkout. Use this checklist to review the setup quickly:
Australia is available at checkout
At least one shipping rate appears
GST (Goods and Services Tax) is calculated as expected
Duties or import taxes appear when applicable
2. How To Choose The Right Shipping Method For Australia
Before comparing international carriers, decide how import charges will be handled. This matters because some services support DDP, while others usually operate under DAP.
#1. Decide whether to use DDP or DAP
The two common arrangements are:
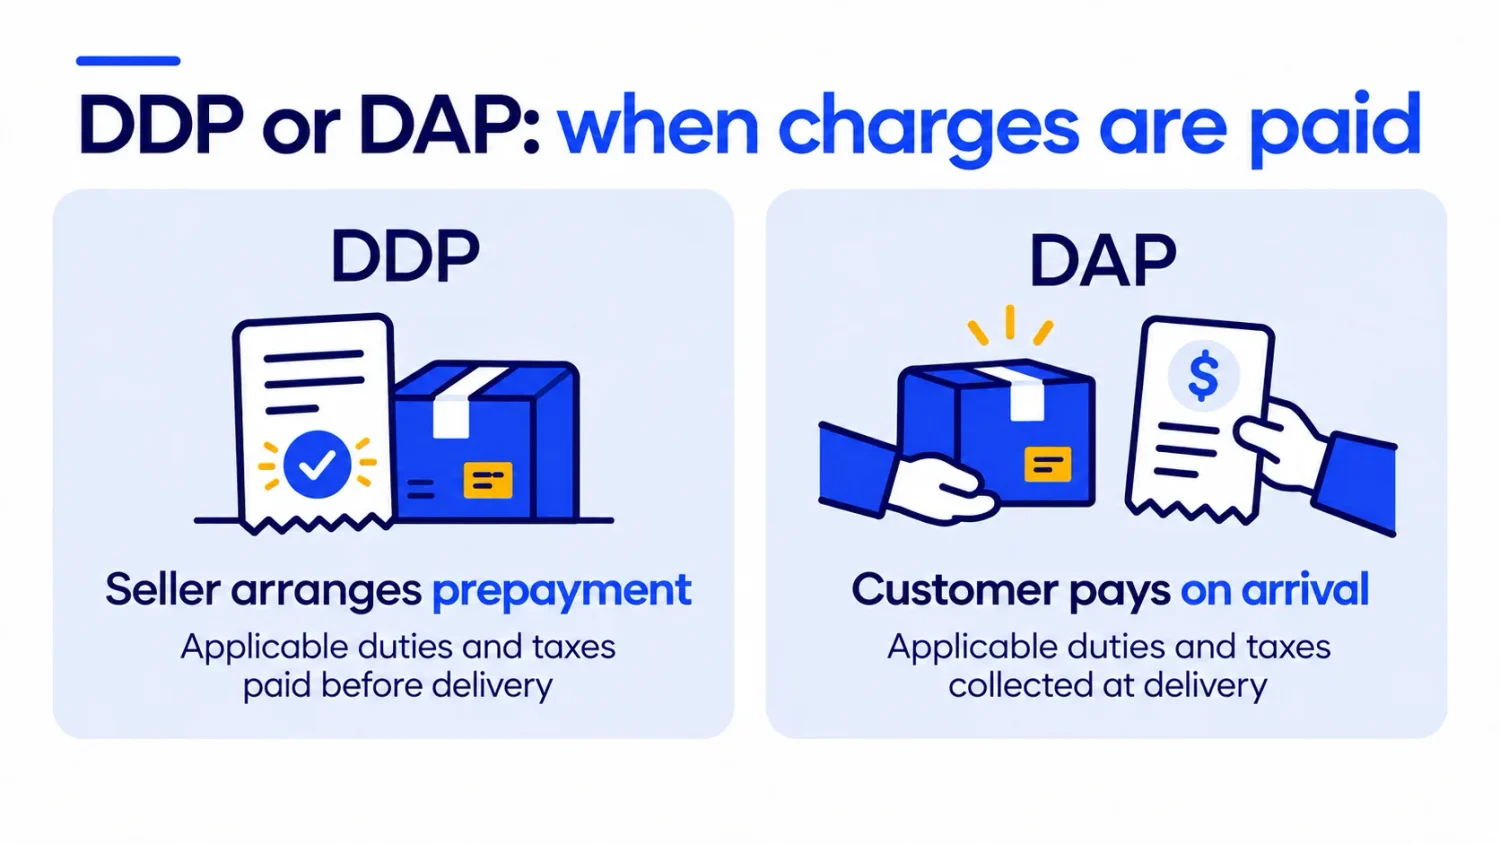
DDP (Delivered Duty Paid): the seller arranges payment of applicable import duties and taxes before delivery. This gives customers a clearer final cost and reduces the chance of an unexpected bill on arrival.
DAP (Delivered at Place): the seller ships the order to Australia, but the customer is generally responsible for applicable import duties and taxes when the parcel arrives.
Make import-charge payment clear so customers know what to expect when their parcel arrives
For most merchants, the key question is whether customers understand the full cost before buying:
If you use DDP, make sure: applicable duties and taxes are calculated correctly; the carrier supports DDP; and the shipping documents show that the charges were prepaid.
If you use DAP, clearly tell customers before checkout that additional import charges may be collected on delivery.
The main risk is not choosing DDP or DAP itself. It is letting customers believe they have paid the full amount and then surprising them with another charge later.
#2. Compare carriers for shipping into Australia
Once you understand how DDP and DAP work, you can compare carriers more easily.
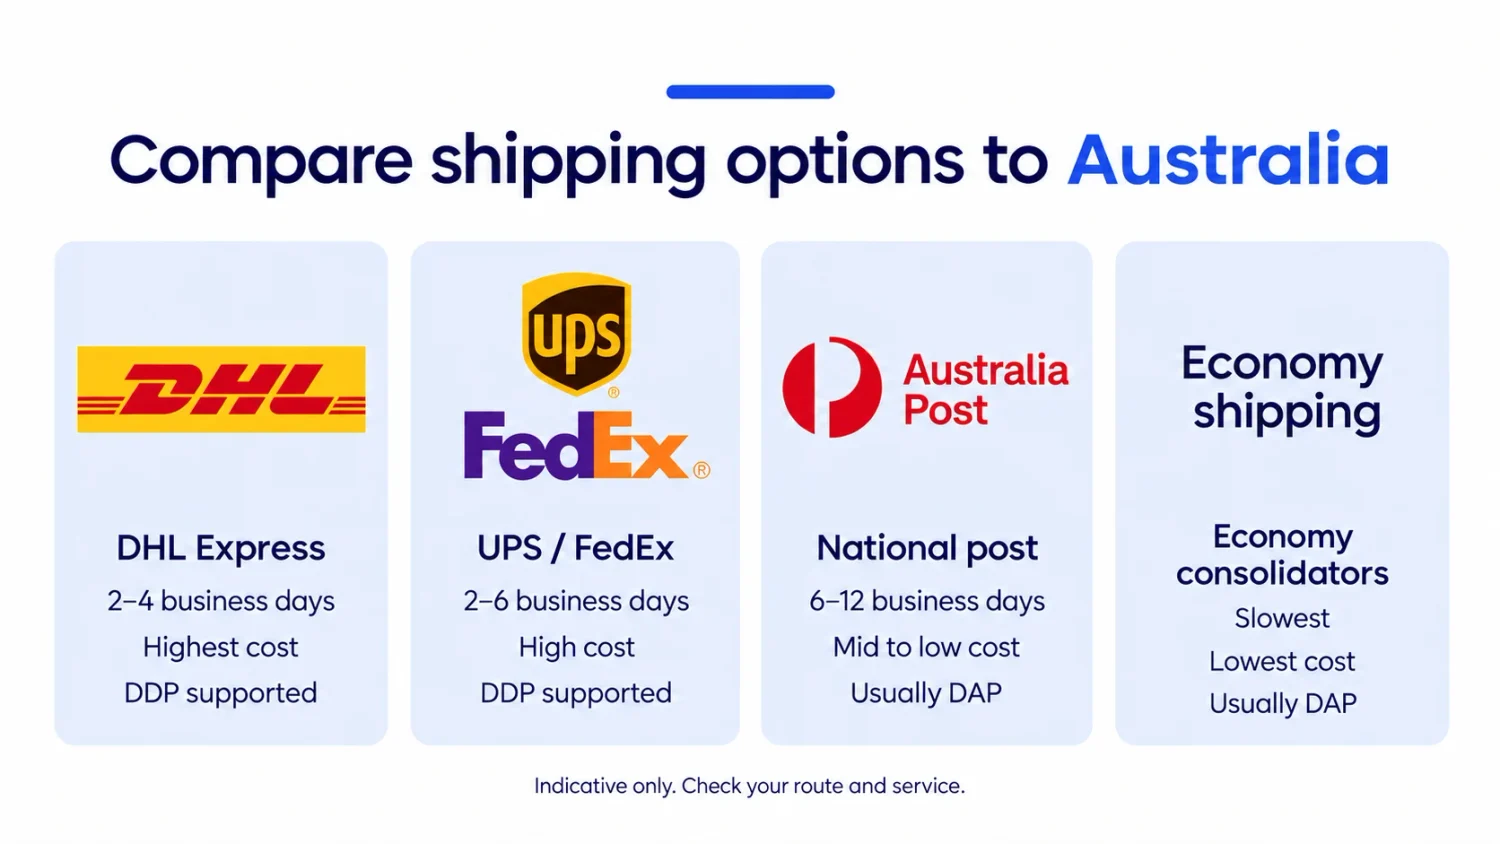
Choose a shipping option that balances delivery speed, cost, and how import charges are handled
Carrier
Typical speed to Australia
Relative cost
Import-charge setup
Best fit
DHL Express
2–4 business days
Highest
DDP supported
Time-sensitive and higher-value orders
UPS / FedEx
2–6 business days
High
DDP supported
Express and B2B shipments
National post → Australia Post
6–12 business days
Mid to low
Usually DAP
Light, lower-value parcels
Economy consolidators
Slowest
Lowest
Usually DAP
Non-urgent, price-sensitive orders
3. Which Shopify Shipping App Is Best For Australia?
Choosing the right carrier is only part of the setup. If you want to compare multiple carriers, automate label creation, manage more complex shipping rules, or handle cross-border duties more efficiently, Shopify’s native shipping tools aren’t enough.
That is where a Shopify shipping app becomes useful. The right app depends on the problem you are trying to solve. All will be broken down into a table comparison as below
• Australia Post, StarTrack, DHL, Aramex, CouriersPlease and other carriers• Carrier rate comparison• Shipping label printing• Invoices and picklists• Tracking sync back to Shopify
Best for Australian merchants who want a practical multi-carrier label and fulfillment workflow
• Australia Post MyPost integration• eParcel and StarTrack support• Live and contract rates• Shipping rules• Bulk labels• Pickups and manifests• Packing slips
Best for merchants heavily focused on Australia Post and StarTrack
• Branded tracking pages• Automated email and SMS updates• Estimated delivery dates• Tracking analytics• Multi-carrier tracking• API and webhook support
Best as a post-purchase tracking layer
Use your shipping problem to narrow the list.
Choose Starshipit if your main need is multi-carrier automation in Australia and New Zealand.
Consider Shippit if you want to compare and manage several local carriers.
Look at ReadyToShip if you mainly want a cleaner domestic label workflow.
Consider Easyship if cross-border shipping is the bigger challenge.
Look at PluginHive if your operation is heavily focused on Australia Post or StarTrack.
Add AfterShip if tracking and post-purchase communication are the main problems you want to solve.
4. Reduce Shipping Costs And Improve Checkout Rates When Selling To Australia
A reliable shipping setup isn’t just about choosing the cheapest rate. Merchants should focus on predictable costs, avoiding checkout errors, and setting clear delivery expectations. A few practical rules you should bear in mind before setting your shipment to Australia:
Keep product weights and package dimensions accurate so carrier-calculated rates do not return the wrong price.
Compare actual and cubic weight, because carriers may charge based on whichever is higher.
Use a backup shipping rate so customers can still check out if a live carrier quote fails.
Set clear delivery expectations for metro, regional, and remote Australian addresses.
Review shipping costs regularly, especially when carrier surcharges or packaging costs change.
Use a free shipping threshold to improve conversion rates
A well-calculated free shipping threshold can encourage shoppers to complete their purchase or add more to their cart. According to the Baymard Institute, 39% of shoppers abandon checkout because of extra costs, including shipping fees. That makes free shipping a useful incentive for reducing checkout friction.
You can create a free shipping threshold directly in Shopify, but the native setup has some limitations:
Limited flexibility for targeting free shipping offers to specific product groups or collections.
No built-in live progress indicator to show shoppers how close they are to unlocking free shipping.
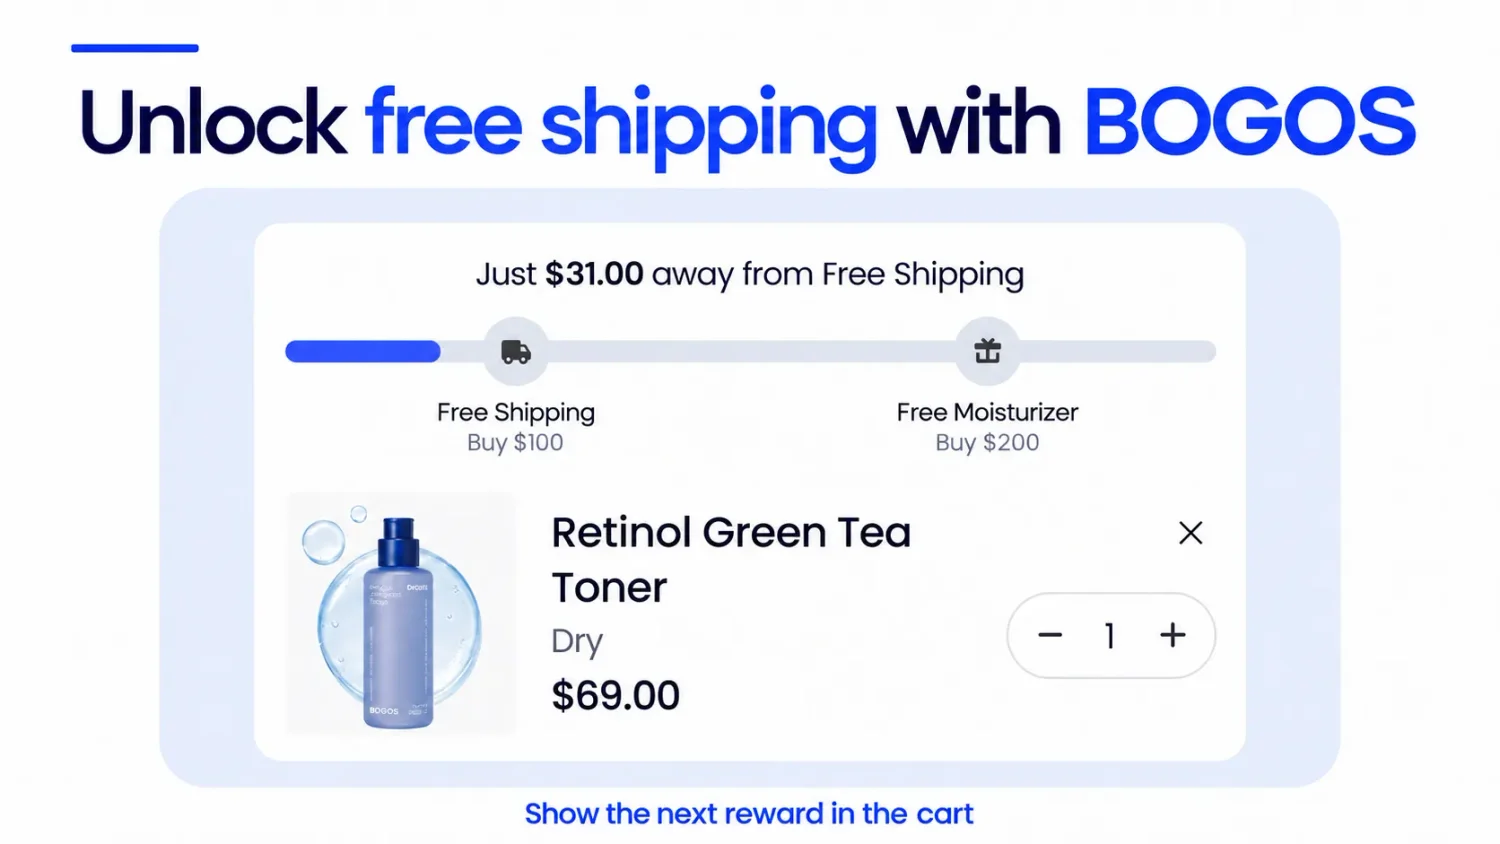
Show shoppers their next reward to encourage them to add more to their cart
BOGOS: Free Gift Bundle Upsell helps address both limitations. You can create free shipping as a reward for purchases from specific product collections and make the offer more visible across your storefront.
For example, you can use:
A live progress bar in the cart drawer to show shoppers exactly how much more they need to spend to unlock free shipping.
A countdown timer on the homepage to highlight the offer and create a stronger sense of urgency.
This makes free shipping easier to personalize and more visible throughout the shopping journey, giving shoppers a clearer reason to spend more and helping increase average order value.
Klower Pandor, a Taiwanese fragrance brand, used this combination as part of its BOGOS strategy and achieved a 13X increase in total revenue within 28 days of installing the app. You can explore the full strategy in our Klower Pandor success story.
Conclusion
The goal is simple: make shipping reliable, transparent, and easy to buy. In Shopify, add Australia to an active market, set a valid shipping rate, connect the right carrier or app, and keep product weights and customs details accurate. For overseas orders, make sure GST (Goods and Services Tax), HS codes, country of origin, and import-charge handling are set correctly. Once the basics work, use free shipping and a visible progress bar to turn shipping into a conversion and AOV driver.
FAQs
#1. Do overseas Shopify stores need to register for Australian GST?
Not necessarily from the first Australian sale. For overseas sellers, GST registration depends on factors including Australian sales turnover and the type and value of goods being sold. If you meet the relevant registration threshold, Australia’s low-value imported goods rules may require you to collect GST at the point of sale on eligible consignments worth A$1,000 or less.
#2. Why are Australian shipping rates not appearing at checkout?
Start by checking four things: 1. Australia belongs to an active market. 2. The customer’s address belongs to one of your shipping zones. 3. At least one shipping rate applies to the order. 4. Your products contain the information needed for any carrier-calculated rate. If you expect live carrier rates, also confirm that your Shopify plan and carrier setup support carrier-calculated shipping.
#3. What is the best Shopify shipping app for Australia?
There is no single best app for every Australian store. The best option depends on the problem you need to solve. For example: – Starshipit focuses on multi-carrier automation; – Easyship is more cross-border focused; – PluginHive provides deeper Australia Post functionality; and – AfterShip focuses on tracking rather than rate calculation




![[2026] Shopify Testimonials: 3 Ways To Add Them + Best Apps](https://bogos.io/wp-content/uploads/2026/10/Shopify-Testimonials-400x225.jpg)