
6 Best Shopify Page Builders With AI Features
With the right Shopify page builder, merchants can redesign their store theme themselves without needing extensive coding knowledge. Store...
Digital Marketing Specialist
Creating a Shopify discount on one item only is a smart way to boost sales while maintaining product value. For example, you can discount one shirt in a cart of three, leaving the others at full price, which increases sales without over-discounting. This article explains 3 easy ways to set this up: using Shopify’s built-in discount tools, trying automatic discount apps, or offering the extra item as a gift or upsell. Let’s explore them now!
Now, we’ll delve into 3 methods in detail, making sure you can apply them successfully the first time.
Shopify’s built-in discount tool allows you to create discounts easily, but there’s a key point to note. If you’re trying to apply a discount to just one item in a cart, percentage-based discounts won’t work.
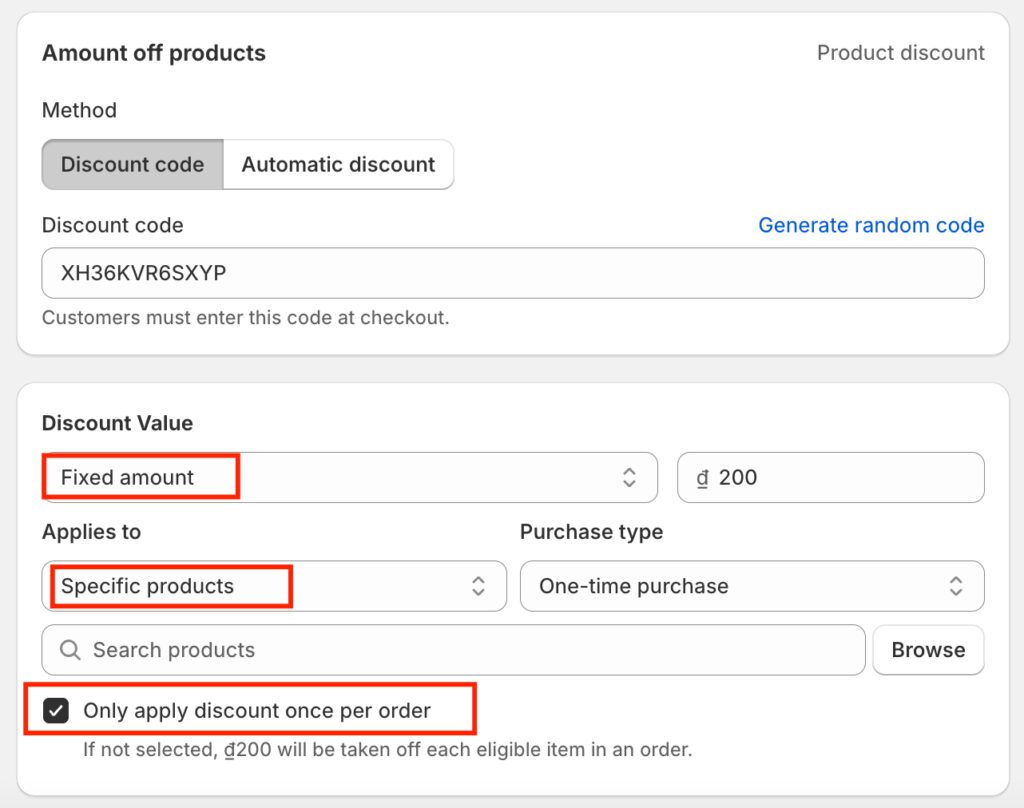
Instead, you must create a discount by a fixed amount to target a specific item effectively. This ensures the discount applies only to one item, not the entire quantity in the cart. Now, let’s see how to process this method.
Step 1: Access the Discounts Page
From your Shopify Admin dashboard, navigate to “Discounts.” Click the “+ Add discount” button at the top-right corner to start creating a new discount.

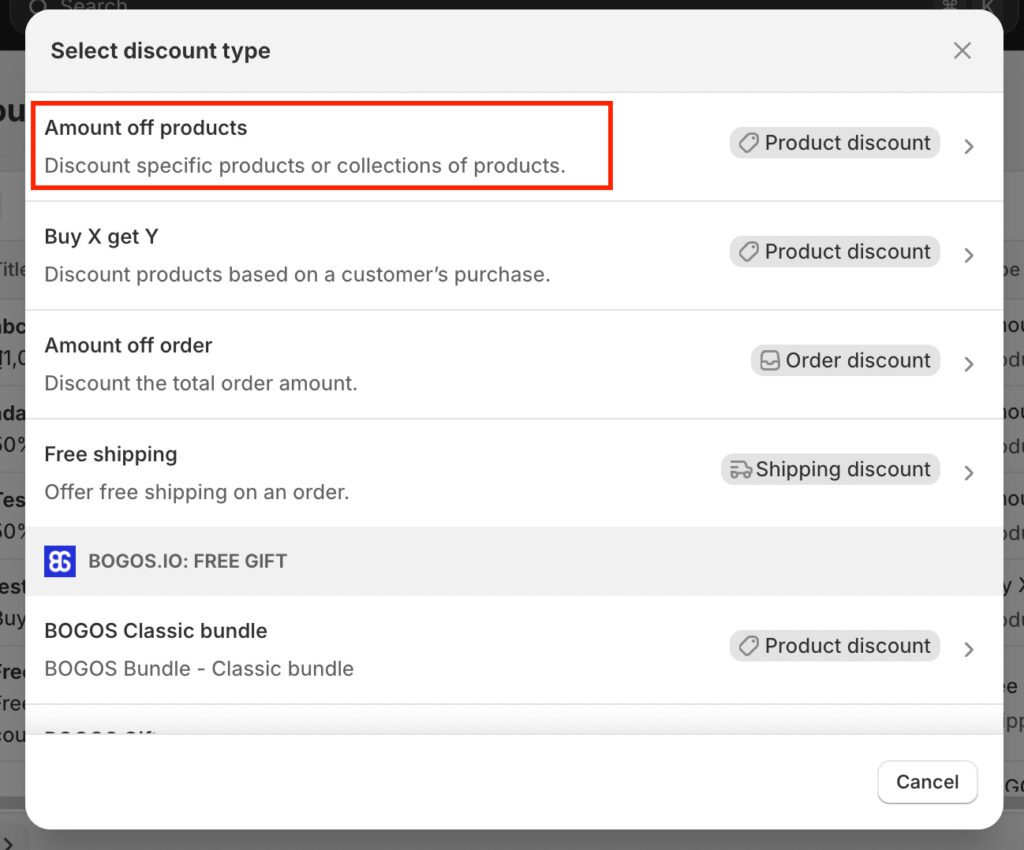
Step 2: Choose Discount TypeIn the “Select discount type” pop-up, choose “Amount off products” under the Product Discount category. This option allows you to apply a specific discount amount to selected products.
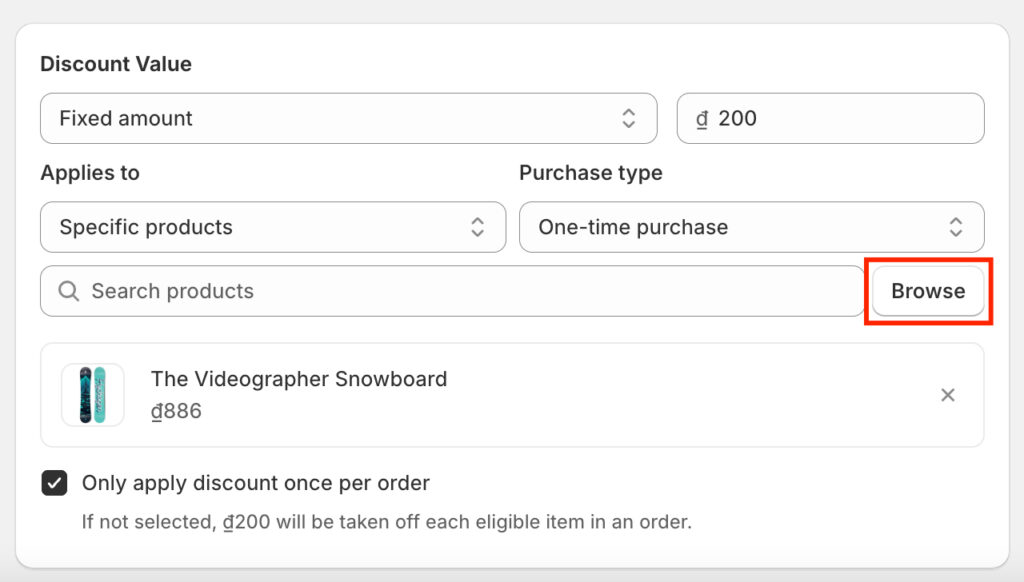
Step 3: Set Discount Details: Enter the discount details in the setup form:
Step 4: Save the DiscountReview the details and click “Save” in the top-right corner. Your discount will now be active and ready to use in your store.
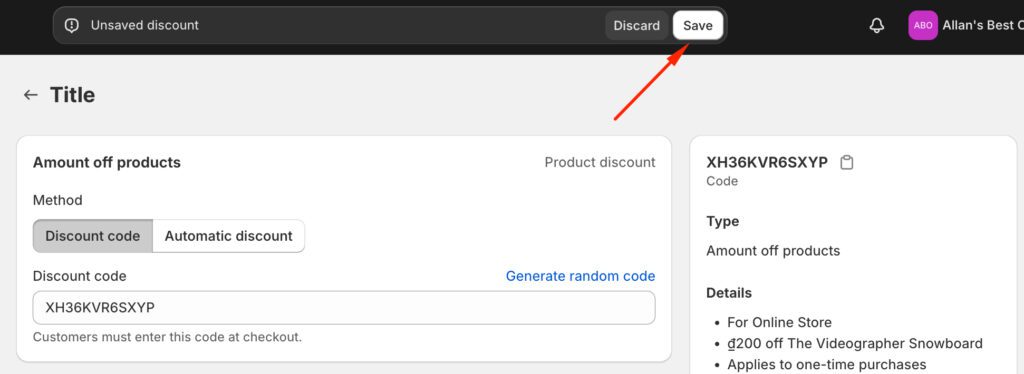
This simple method works smoothly within Shopify’s built-in tools, making it a great option for many store owners.
Pros:
Cons:
If you’re looking for a more advanced and automated solution, the Regios Automatic Discounts app is an excellent choice. This app makes it easy to apply Shopify discount codes and automatic discounts for specific product scenarios with customizable conditions and logic. It is perfect for situations where you want to discount just one product from a group.
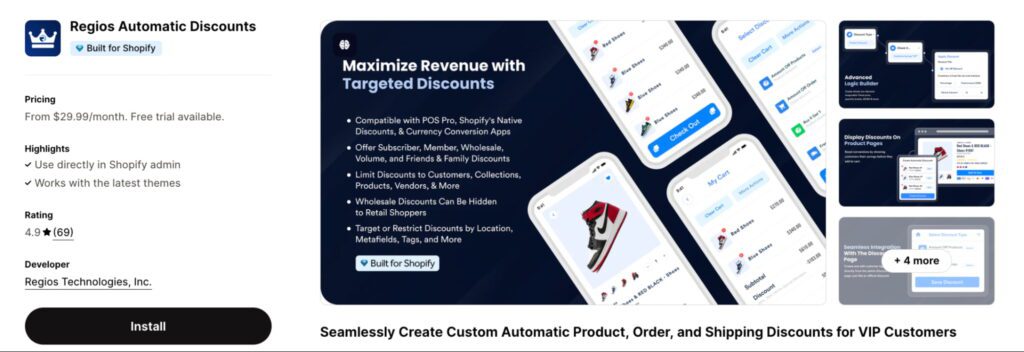
Here’s why this app stands out:
Pricing
The app offers flexible pricing based on your store’s needs:
How to Use?
Step 1: Click “Create discount,” then select the “Amount off products” option in the app.
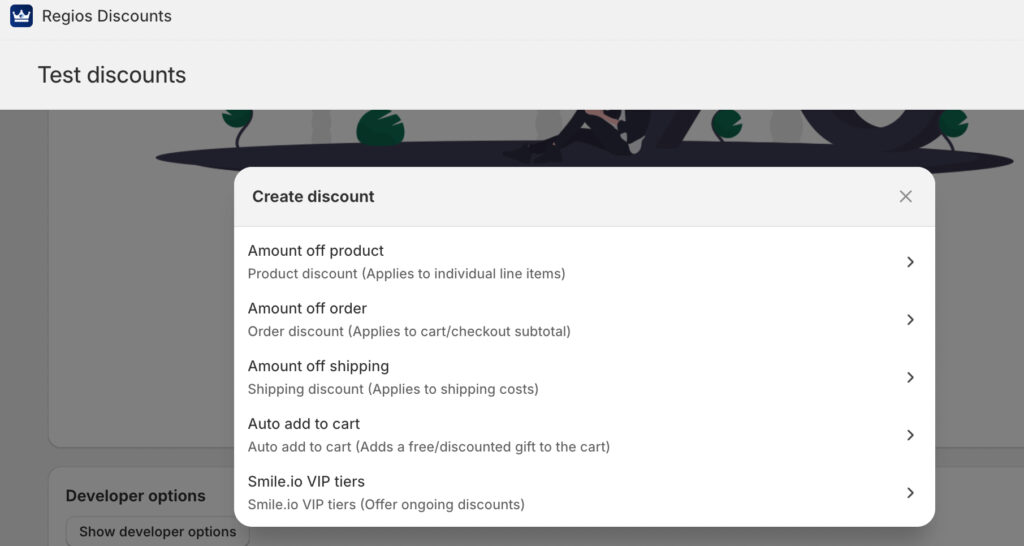
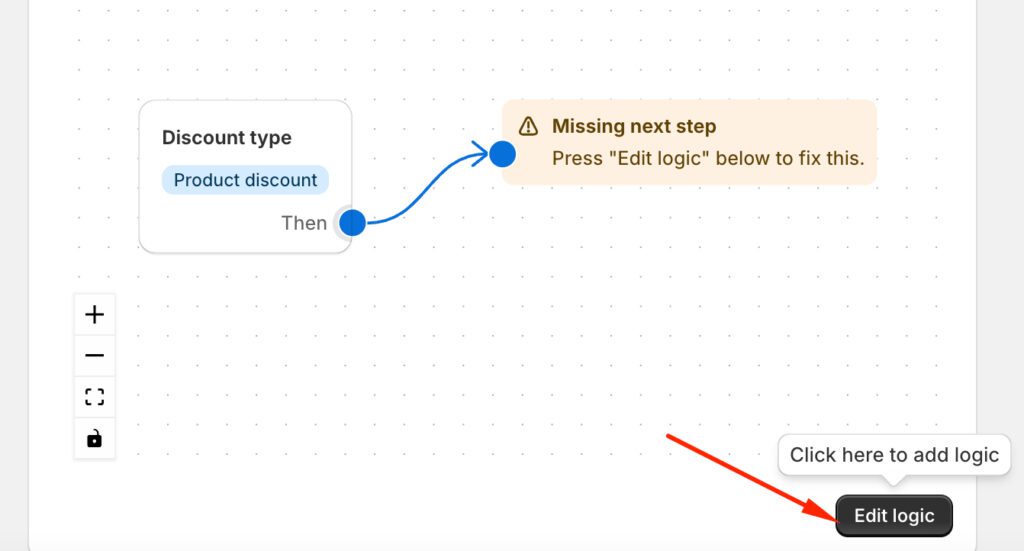
Once you’ve chosen this, click the Edit Logic button to customize the discount settings. You’ll then be prompted to select a template.
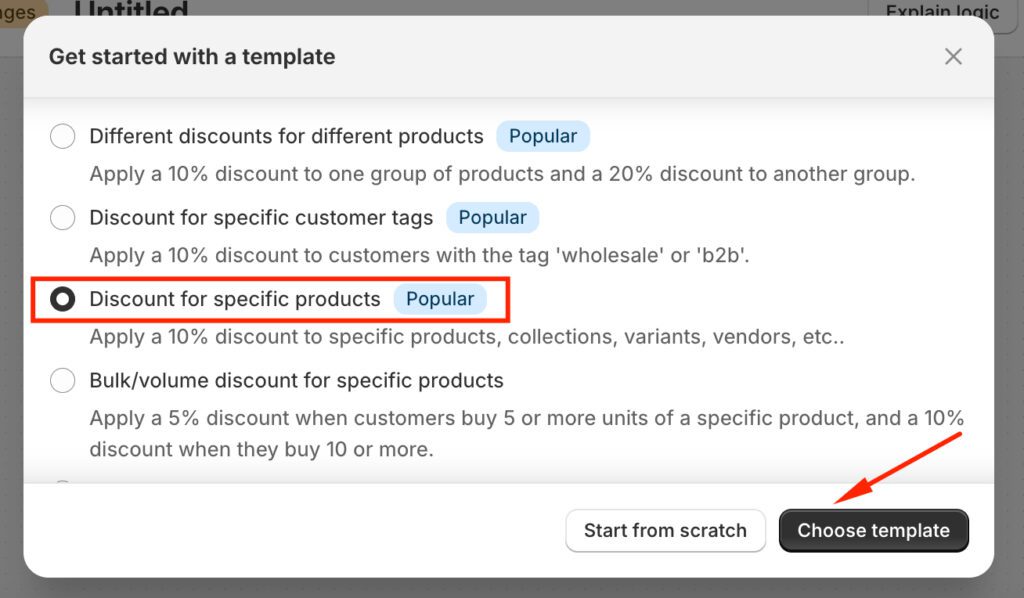
Pick the Discount for specific products template, which is perfect for applying discounts to a single item in the cart.
Step 2: After selecting the template, refine the rules by clicking Edit Criteria if needed. This section allows you to define when and how the discount applies.
You can choose whether all conditions must be met (AND) or if the discount can apply when any condition is met (OR). This helps you create strict or flexible discount rules based on your needs.
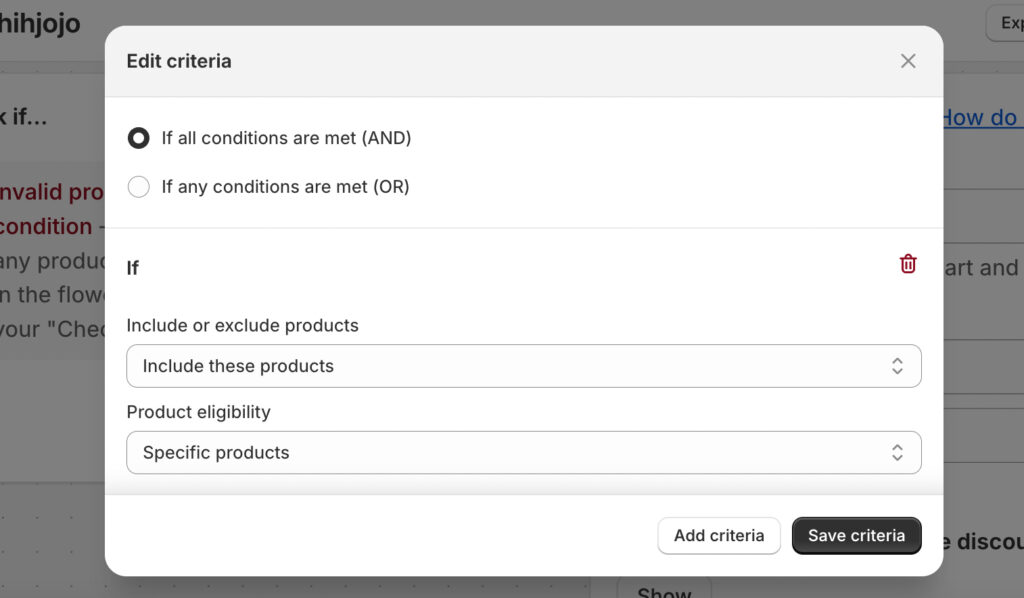
Step 3: Move on to customizing the discount logic. Here, you can define how the discount works – set a fixed amount, limit it to one item, and specify additional rules. Adjust advanced options like whether the discount applies to sale items or which items in the cart should be discounted first, such as the highest-priced product.
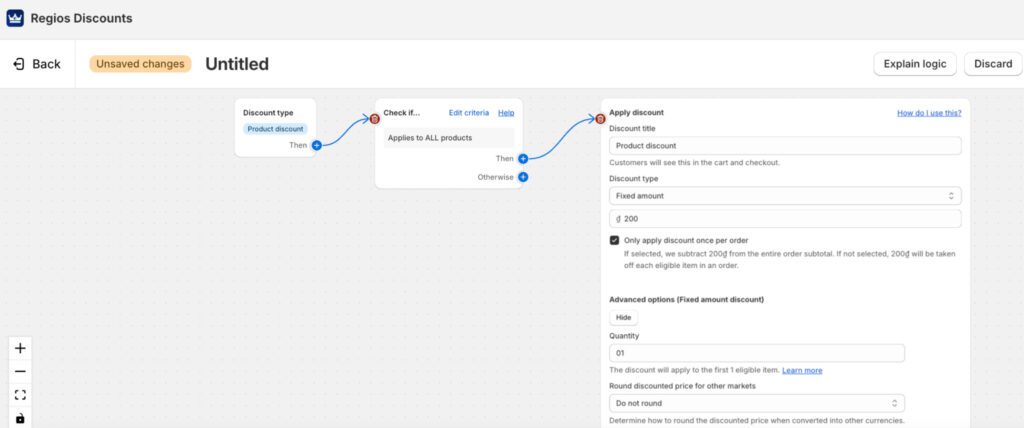
Once everything is configured, save your discount. The app will automatically apply the rules during checkout, ensuring the discount works exactly as intended.
Read more: How to Exclude Products From Discount Shopify?
Unlike the earlier methods that focus on straightforward discounts, this method stands out by adding a rewarding gift to your customer’s shopping experience. Instead of just lowering prices, it lets you offer extra products as gifts or upsell items, like “Buy 1 Get 1 Free” or “Buy 2 Get 1 Free”. This encourages customers to spend more and makes shopping feel more exciting and personalized.
BOGOS will be your first choice for effortlessly creating these kinds of promotions. Here are some outstanding features of this app:
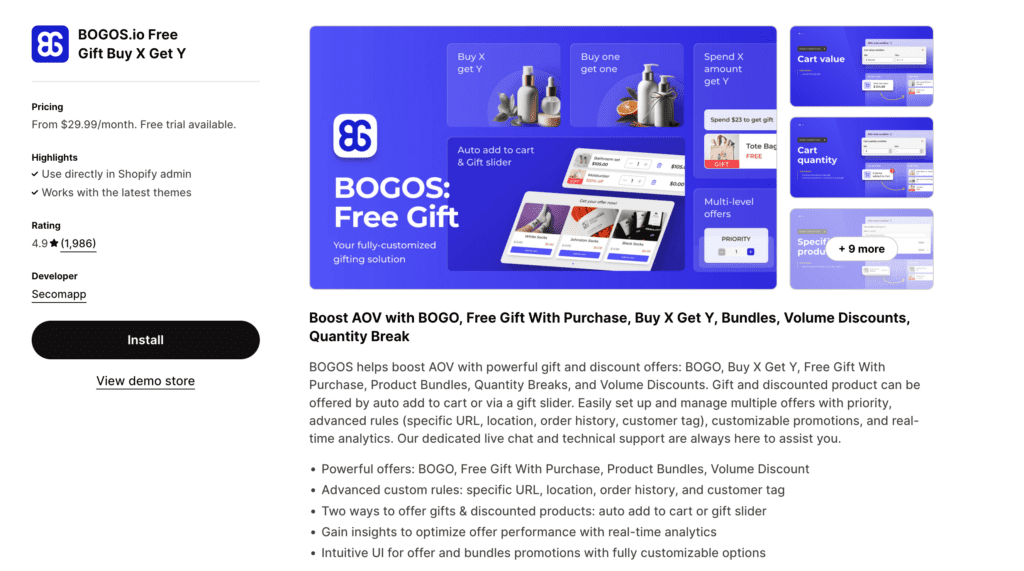
The pricing starts at $29.99/month, with more advanced plans available for larger businesses. All plans come with a 7-day free trial, so you can test it before committing.
Steps to Set Up a Gift Offer with BOGOS
Step 1: Start Your New Offer
Open the BOGOS app from your Shopify dashboard and click “Create Offer.” Select the “Buy X Get Y” option to design your promotion. This is where you decide what customers need to buy to unlock the free gift.
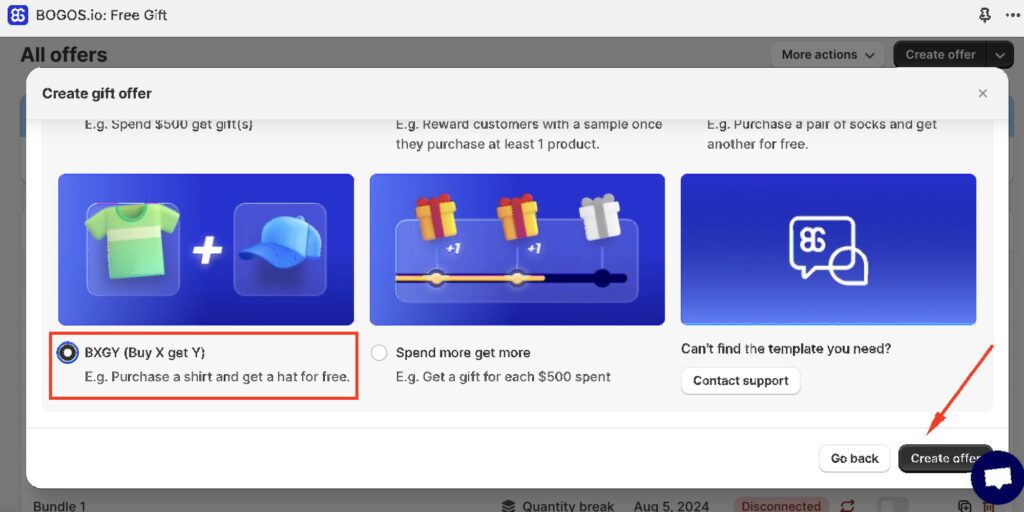
Step 2: Set Your Offer Conditions
Now, define the rules of your offer. For example, specify how many items a customer needs to purchase (e.g., Buy 2 to get 1 free). Decide if the gift will be the same product or a completely different one. You can also customize the conditions further, like applying the offer only to certain products or collections.
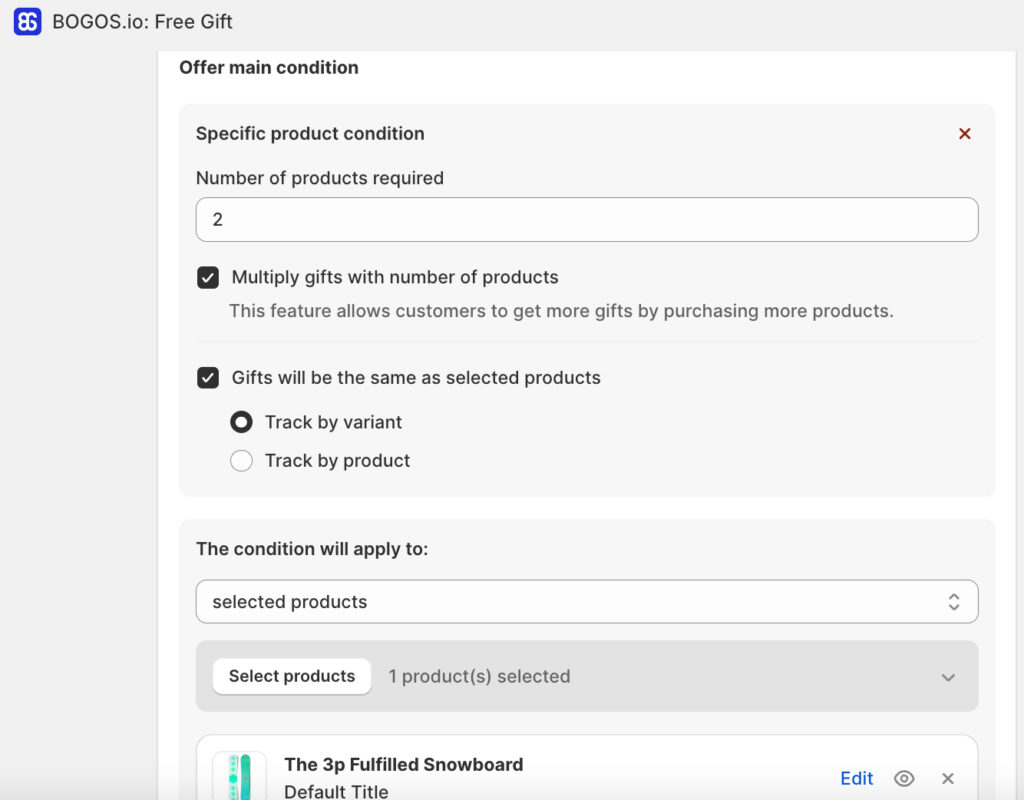
Step 3: Add Sub-Conditions (Optional)
Refine the offer by adding conditions like customer location or access via a specific link. Click Add Sub-Condition and select an option if needed.
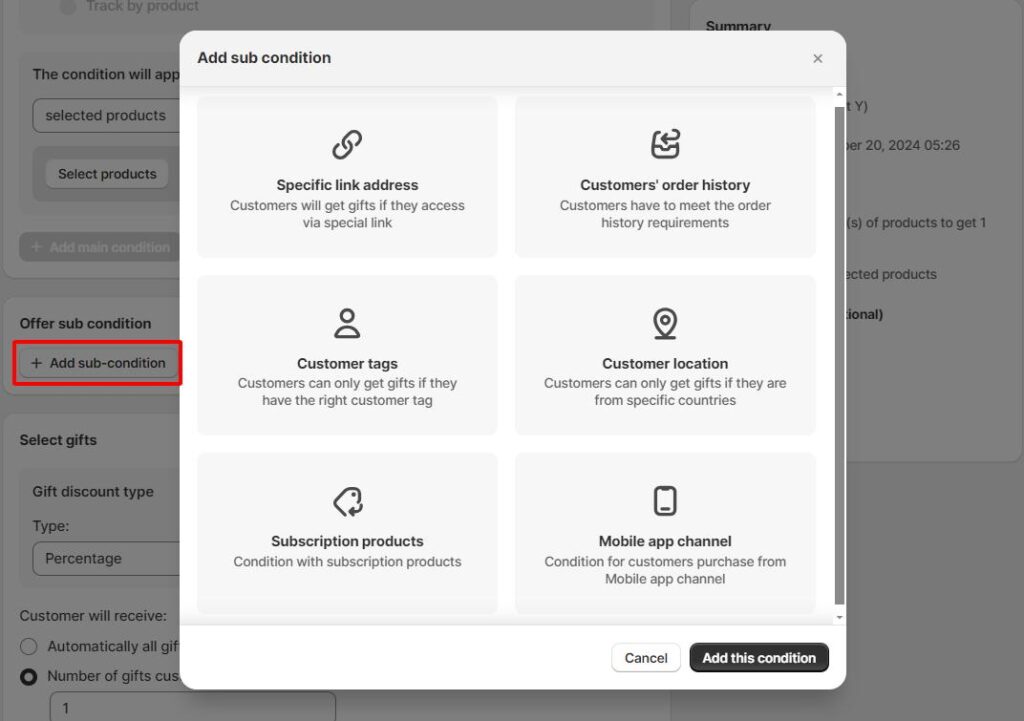
Step 4: Define Gift Details
In the “Select Gifts” section, set the Gift Discount Type to “Percentage” and enter 100% for a free gift. Specify how many gifts customers can receive and select the gift product.
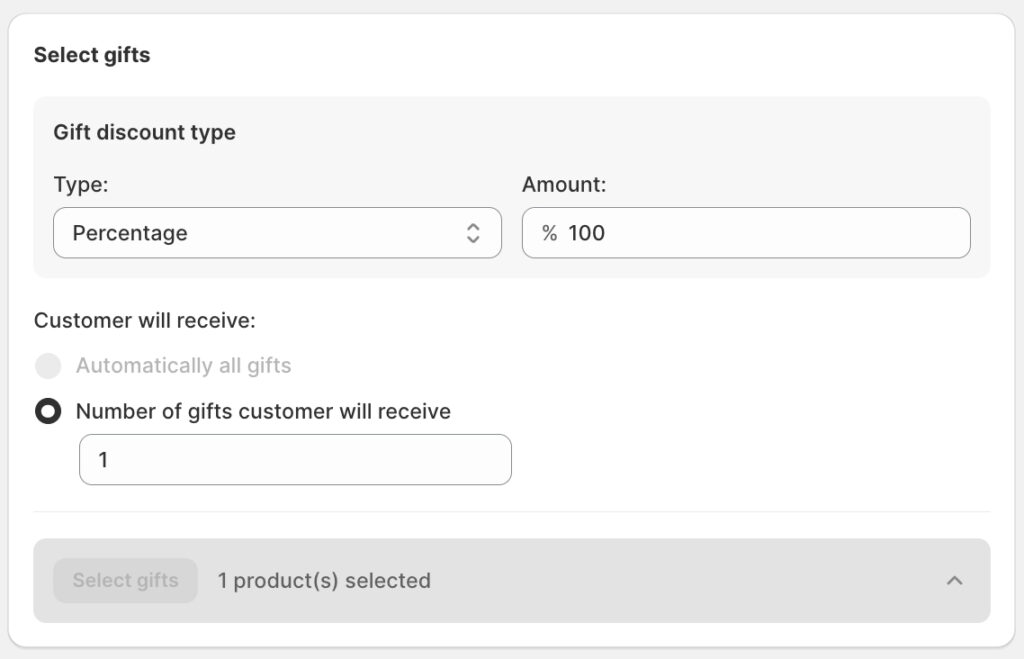
Step 5: Finalize and Publish
Review your settings. Add a cart message or prioritize the offer if needed under “Advanced Configuration.” Click Save Draft or Publish to activate.
In general, creating a Shopify discount on one item is not just about saving your customers money; it’s a great way to keep them engaged and excited about shopping with you. Whether you go for a simple built-in discount, use advanced apps like Regios for more flexibility, or offer fun deals like “Buy 2 Get 1 Free” through BOGOS, the options are endless. Try these creative ideas to make your store stand out and turn casual browsers into loyal buyers!
When setting up the discount, check the option “Only apply the discount once per order” to ensure it applies to just one item, regardless of quantity.
Shopify’s native discount features don’t support this directly, but third-party apps like Regios Automatic Discounts can provide this functionality.
You can create tiered discounts by setting up multiple discount codes or using apps like Discount Mixer to automate the process for specific products or collections.


With the right Shopify page builder, merchants can redesign their store theme themselves without needing extensive coding knowledge. Store...

Running a promotion sounds simple: select a discount, launch the campaign, and watch sales go up. But many Shopify...

If you are heading into 2026 planning bigger campaigns, now is the right time to tighten your onsite conversion....
